
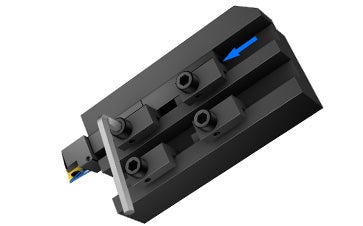
Quick change with QS™ holding system
How to apply QS™ holding system
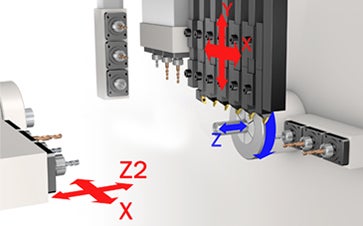
Machine configurations
Get tips on how to configure your sliding head machine and other good to know information when it comes to this machine type.
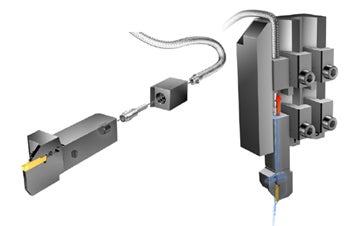
How to assemble and disassemble the coolant kit
How to assemble
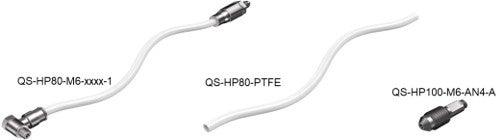
- Make sure the end of the hose is not damaged (a slight ring mark from earlier assembly is OK). If the end is damaged, use a sharp knife to cut a clean undamaged end.
- Push in the undamaged end of the hose firmly into the bottom of the M6 banjo fitting.
- Assemble the M6 fitting, including the hose, to the QS-HP stop and fit it in the machine and firmly tighten.
- Assemble the machine side hose connection, machine fitting and copper washer in the machine and firmly tighten.
- Measure the required length of the hose. Make sure to consider maximum tool movement and a minimum bend radius of 75 mm (3 inch). Also allow a bit longer hose if it is expected to be frequently disassembled-reassembled in order to be able to cut the end if damaged.
Note: A hose that is too long has a higher risk of being damaged in the machine by chips.
- Cut the hose to length with a sharp knife.
- Push in the undamaged end of the hose firmly into the bottom of the machine side fitting
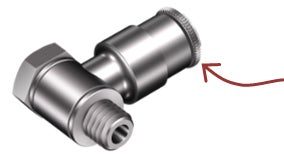
How to disassemble
Hold the ring of the quick disconnect fitting very firmly towards the fitting (away from the hose) and while holding the ring, pull the hose out from the fitting. Some force may be required.
Note: Inspect the coolant kit regularly to identify any damages. In case of damages on the hose, replace it. Apply Teflon tape to any leakages in the screw fittings.
|
Ring |
| M6 banjo fitting |
Recommendations
Wedges for QS™ holding system
What wedge to use depends on machine brand, model and shank size. Use this table to find the suitable wedge for your sliding head machine.
| Wedge | Machine brand | Model | Shank size | |
| ISO metric | ANSI inch | |||
| QS-150 | Tsugami | BH 38 | 1616 | 10 (5/8) |
| QS-160 | Tsugami | BS 32/BS 20 | 1616 | 10 (5/8) |
| QS-140
For front position |
Tsugami | S 205/S 206/S 207 | 1212 | 08 (1/2) |
| QS-140 HP
For back position |
Tsugami | S 205/S 206/S 207 | 1212 | 08 (1/2) |
| QS-130
For front position |
Tsugami | B0,BS,BU,BM,BN,BA and BW models | 1212,1616 | 08 (1/2),10 (5/8) |
| QS-410 | Hanwa | XD 20H,J/XD 26H | 1212 | 08 (1/2) |
| QS-450 | Hanwa | XD 32H | 1616 | 10 (5/8) |
| QS-10 | Citizen | R04/R07 | 808 | 6 (3/8) |
| QS-20 | Citizen | A16,C12,K12,K16,L16,L20 | 1010 | 6 |
| QS-30 | Citizen | A20,B20,C16,C20,C32,K12,K16,L16,L20 | 1212 | |
| QS-30A | Citizen | A20,B20,C16,C20,C32,K12,K16,L16,L20 | 08 (1/2) | |
| QS-31 | Citizen | L16 VIII, L720 | 1212 | |
| QS-31A | Citizen | L16 VIII, L720 | 08 (1/2) | |
| QS-40 | Citizen | L32,M20,M32 | 1616 | |
| QS-40A | Citizen | L32,M20,M32 | 10 (5/8) | |
| QS-31 | Doosan | PUMA ST20G | 1212 | |
| QS-40 | Doosan | PUMA ST32G | 1616 | |
| QS-130 | Tornos | Delta 12/20 | 1212,1616 | 08 (1/2),10 (5/8) |
| QS-230 | Nexturn | SA20 | 1212 | |
| QS-230A | Nexturn | SA20 | 08 (1/2) | |
| QS-240 | Nexturn | SA26 | 1616 | 10 (5/8) |
| QS-351
(For back position and front position for parting off tools) |
Star | SB-16,SC20,SE12/16 | 1010 | 6 (3/8) |
| SE16B,SR16,SR20,SR20R | 1212 | 08 (1/2) | ||
| S25/32J | 1616 | 10 (5/8) | ||
| QS-352
(For front position for turning tools) |
Star | SB-16,SC20,SE12/16 | 1010 | 6 (3/8) |
| SE16B,SR16,SR20,SR20R | 1212 | 08 (1/2) | ||
| S25/32J | 1616 | 10 (5/8) | ||
| QS-371 For front position |
Star | SB16, SV30 | 1010 | 6 (3/8) |
| QS-372 For back position |
Star | SB16, SV30 | 1010 | 6 (3/8) |
| QS-361 | Star | SB20R | 1212 | 08 (1/2) |
Liity meihin. Pysy ajan tasalla.
Tilaa uutiskirje jo tänään

Sandvik Coromant Finland
+358942451675